Appearance
Store Panel - Quick start guide
Here, we'll cover the basics of starting with Let's Shop TT: create a store account, configure your store, and add your first item.
Creating a store account

Go to the store registration page 👉 https://letsshoptt.com/store/apply.
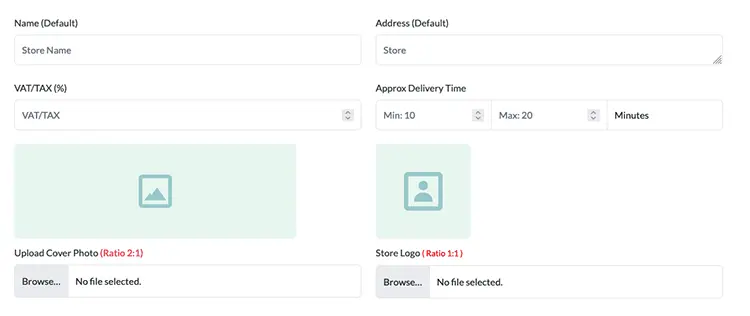
Begin by providing your store name, address, VAT percent, and estimated delivery time. Then, upload your logo and cover photo.

Choose your zone and store type. Then, set your location on the map.
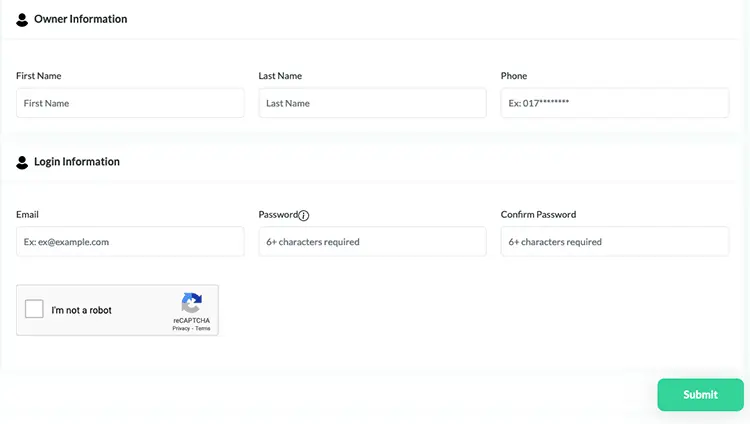
Enter the store owner's name, phone number, store email, and chosen password. After submitting your registration, you'll be redirected to the home page. Please await account verification before logging in. You'll be contacted for the verification process.
Configuring store
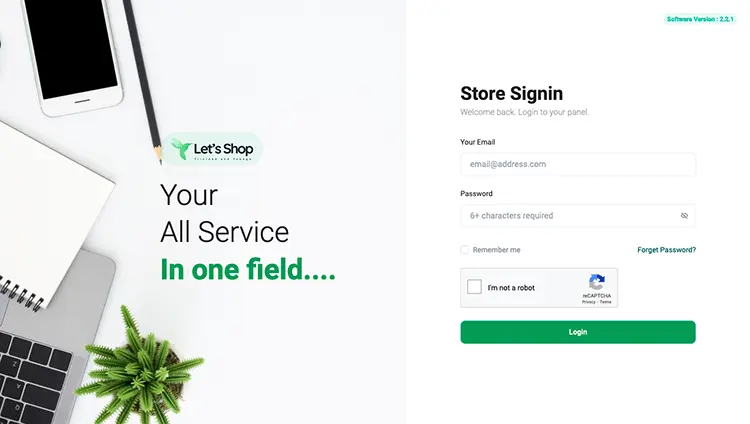
After your account is verified, you can log in to your store account by visiting 👉 https://letsshoptt.com/login/store.
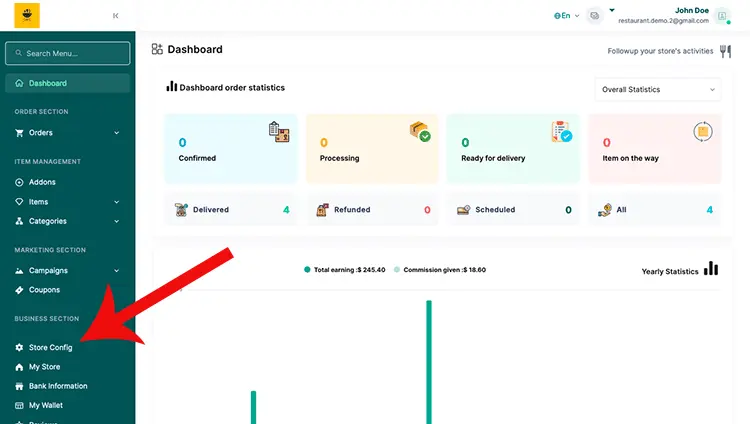
Click on "Store Config" in the navigation bar. This will lead you to your store's configuration page, where you can adjust crucial settings for your restaurant.
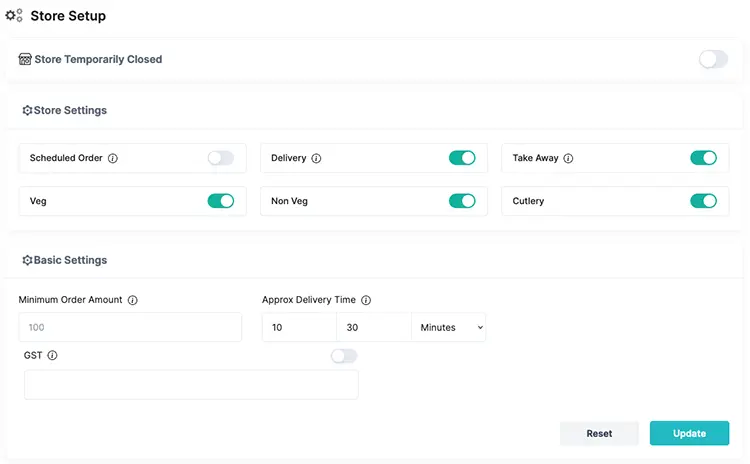
- Schedule Order: Enable option for later time or date orders.
- Delivery: Allow customer delivery requests.
- Cutlery: Prompt customer for cutlery preference.
- Take Away: Allow in-person pickup requests.
- Veg: Enable/disable vegetarian item types.
- Non Veg: Enable/disable non-vegetarian item types.
- Minimum Order Amount: Set the minimum purchase amount.
- Approximate Delivery Time: Specify delivery time (in minutes, hours, or days).
- GST number
Click "Update" to save the changes.
More below 👇
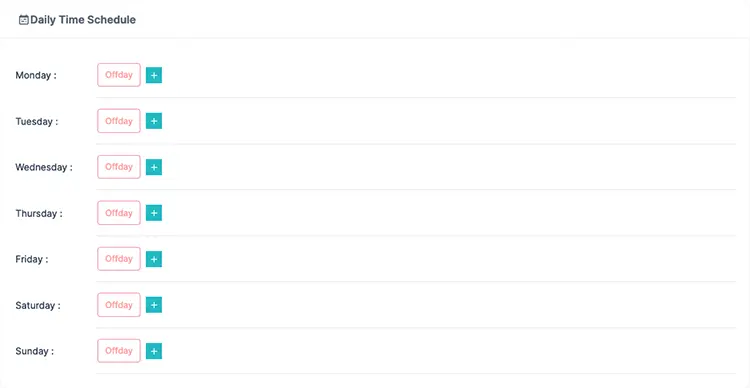
- Daily Schedule Time: Store operating hours for each day.
Creating item
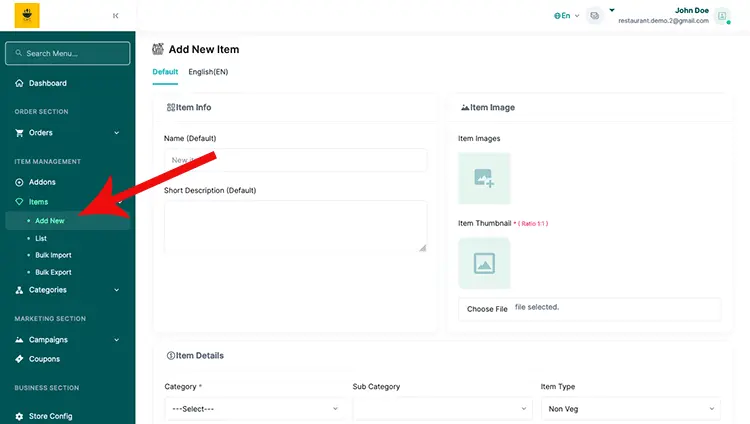
Click "Add New" under the Items section to create a new item. Each store type may have unique options. Refer to the Item Management guide for detailed instructions on creating and editing items specific to your store type.